Contents: Removal ⇩ Installation ⇩
Removal
1. Disconnect the ground cable from the battery. For more information, refer to Specification
2. Drain the coolant. For more information, refer to Draining/Filling Coolant and Bleeding the Cooling System (10/26/01)
3. Proceed to the camshaft timing order. For more information, refer to Valve Timing
4. Remove the exhaust manifold. For more information, refer to Right Exhaust Manifold (30.15.11)
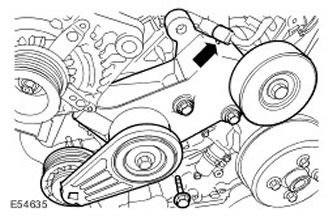
5. Move the radiator support bracket to the side.
- Remove three bolts.
- Release the wiring harness clamp.
- Disconnect the coolant temperature (ECT) sensor electrical connector.
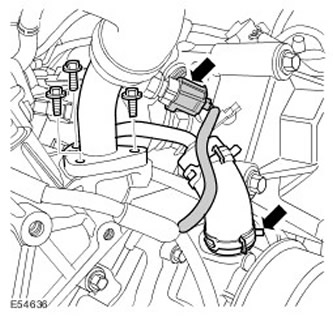
6. Remove the coolant outlet elbow pipe from the cylinder block.
- Disconnect the coolant temperature (ECT) sensor electrical connector.
- Loosen the coolant pump hose retaining clamp.
- Remove three bolts.
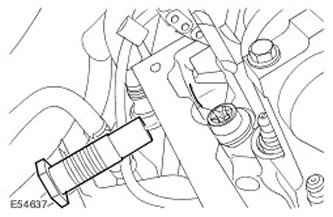
7. Remove the right hydraulic timing chain tensioner.
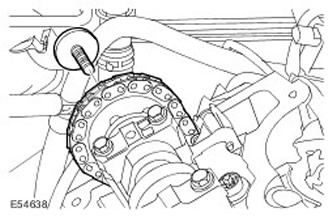
8. Remove the camshaft sprocket bolt.
- Remove the sprocket from the camshaft.
- Fasten the chain and guide with wire.
9.
CAUTION: Loosen the bolts gradually in a criss-cross pattern.
Remove 10 cylinder head bolts. Discard the bolts.
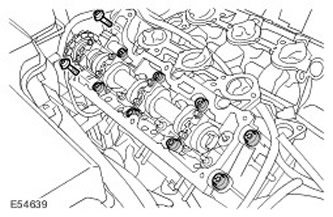
10. Remove the right-hand cylinder head assembly.
- Disconnect the ground connector from the cylinder head.
- Remove the bolt.
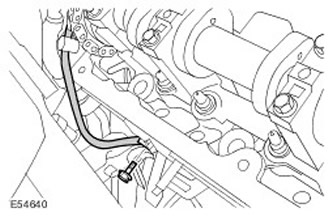
11. Remove and discard the cylinder head gasket.
- Clean the cylinder head dowel pins.
- Clean and inspect the cylinder head and cylinder block.
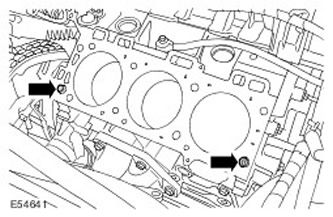
12.
NOTE: Loosen the camshaft bearing caps evenly and gradually.
NOTE: Remember the position in which the part was installed.
NOTE: Do not continue disassembly if the part is being removed only for access.
Remove the camshaft bearing caps.
- Remove eight bolts.
- Remove the camshaft oil supply line.
Installation
1. Install the camshaft.
- Clean the mating surfaces of the parts.
- Lubricate the parts with clean engine oil.
NOTE: Remember the position in which the part was installed.
Install the camshaft bearing caps.
- Clean the mating surfaces of the parts.
- Lubricate the parts with clean engine oil.
NOTE: After installing the bolts, make sure the camshaft rotates freely.
Install the camshaft oil supply line.
- Thoroughly clean and inspect the oil feed line.
- Fill the oil supply line with clean engine oil.
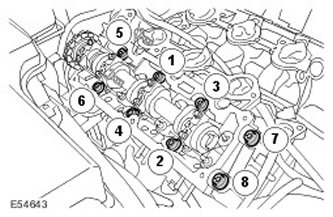
- Tighten the bolts evenly in 2 stages in the sequence shown.
- Tighten the bolts (tightening torque 6 Nm).
- Tighten the bolts (tightening torque 16 Nm).
5. Check the cylinder head surface for deformation in the longitudinal and transverse directions and diagonally. For more information, refer to Specification
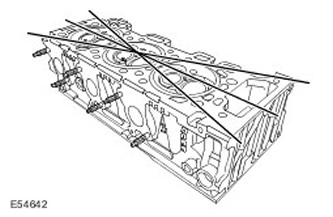
6.
CAUTION: The cylinder head gasket must be installed on the cylinder block studs.
Install a new cylinder head gasket.
7.
NOTE: Use caution when installing ground connections. If the ground is not good enough, one or both banks of the engine will not start.
Install the right bank cylinder head assembly.
- Connect the ground connector to the cylinder head.
- Tighten the bolt (tightening torque 10 Nm).
NOTE: Tighten bolts 1 through 8 in the sequence shown. M12 bolts are tightened in three stages.
Tighten the cylinder head mounting bolts.
- Lubricate the new cylinder head bolts with clean engine oil.
- Tighten the M12 bolts (tightening torque 30 Nm), and then another 80 degrees.
- Tighten the M12 bolts another 80 degrees.
- Tighten the M8 bolts (tightening torque 35 Nm).
9. Install the exhaust manifold. For more information, refer to Right Exhaust Manifold (30.15.11)
10.
NOTE: Part has left hand threads.
The article is based on information from the website www.LRman.ru
Screw in the camshaft sprocket bolt.
- Remove and discard the cable retaining tape.
- Clean the mating surfaces of the parts.
- Install and lightly tighten the camshaft sprocket bolt.
12. Install the cylinder head coolant flange.
- Clean the mating surfaces of the parts.
- Tighten the bolt (tightening torque 10 Nm).
- Secure the hose with a clamp.
- Connect the ECT sensor electrical connector.
- Clean the mating surfaces of the parts.
- Tighten the bolts (tightening torque 45 Nm).
- Secure the wiring harness.
- Connect the ECT sensor electrical connector.
15. Connect the ground cable to the battery. For more information, refer to Specifications
16. Fill the cooling system with coolant and bleed air from the system. For more information, refer to Draining/Filling Coolant and Bleeding the Cooling System (10/26/01)
Comments on this article