Dismantling
1. Remove the plastic lining of the tailgate.
DOORS, Removing the front door assembly to gain access to other components, installing the front door, Plastic trim for the tailgate.
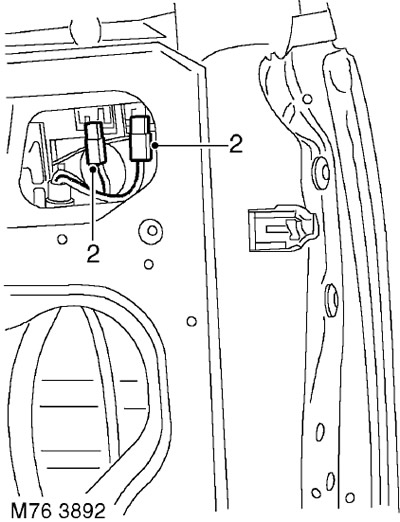
2. Disconnect 2 type electrical connectors "Lucar" from the glass heater.
3. Lower the glass to provide access to the bolts securing the glass to the brackets.
4. Loosen the bolts securing the glass to the brackets, release and remove the rear glass.
Assembly
1. Insert the rear window into the door. Align the position of the brackets with the alignment marks on the glass.
2. Make sure the glass is fully down on the bracket closest to the door hinge. Tighten the bolt securing the glass to the bracket.
3. Set the glass to a horizontal position by lifting the bracket closest to the door lock so that the electrically conductive heater grid is aligned with the lower seal.
4. Tighten the bolts securing the glass to the brackets with a torque of 8 Nm.
5. Raise the glass and connect to the heater type connectors "Lucar".
6. Check that the gap between the glass and the trims of both C-pillars 'E' is 5 mm. If necessary, adjust the position of the glass according to the alignment marks.
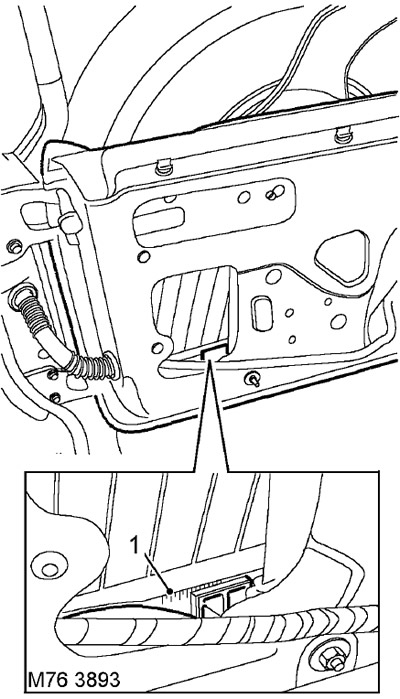
7. Loosen the bottom adjusting lock nuts.
8. Loosen the clamping screws so that there is a gap between the glass and the seal.
9. Tighten the clamping screws so that the glass touches the seal.
10. Tighten the clamping screws to press the seal against the glass by 1 mm.
11. Make sure that the glass is in contact with the seal along its entire length.
12. Lower the glass and tighten the lock nuts to 14 Nm.
13. Check down force.
14. Raise and lower the glass to check for proper fit.
15. Establish a plastic slip on a tailgate.
DOORS, Removing the front door assembly to gain access to other components, installing the front door, Plastic trim for the tailgate.
Comments on this article