Dismantling
1. Disconnect "negative" battery terminal.
2. Remove the cylinder head gasket.
ENGINE - Td4, Intake and exhaust camshafts, Cylinder head gasket: manual transmission models.
3. Remove connecting rod bearings.
ENGINE - Td4, Piston group, Replacement of connecting rod bearings.
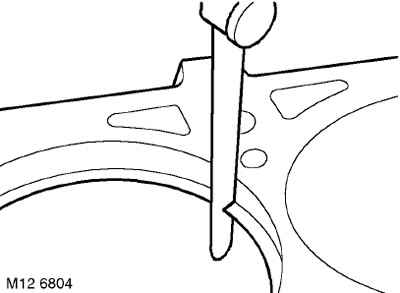
4. Remove carbon from the top of the cylinder.
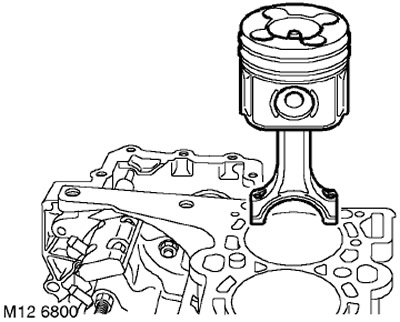
5. Carefully knock the piston out of the cylinder.
ATTENTION: When knocking out the piston, make sure that the connecting rod does not touch the cylinder mirror and oil nozzles.
6. In order for the timing chain not to bite when the crankshaft rotates, the help of a partner may be needed.
7. Do the operations described above with the remaining three pistons.
8. Clamp the connecting rod in a vice with soft jaws.
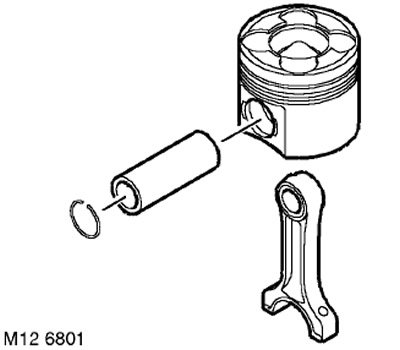
9. Using two thin screwdrivers, carefully remove and discard the two piston ring circlips.
10. Push the piston pin out of the piston and connecting rod and remove the piston.
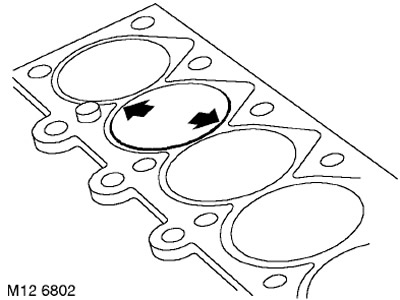
11. Pistons and cylinders: Measure the diameter of the cylinder in the lower, middle and upper zones in the plane indicated in the figure. Write down the measurement results.
TECHNICAL DATA, Engine - Diesel Td4.
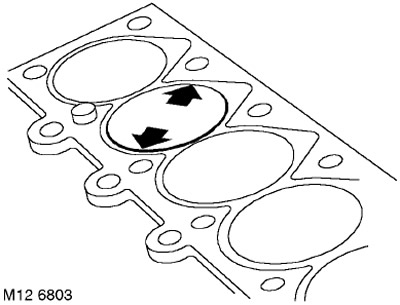
12. Repeat the measurement in the plane shown in the figure and for two groups of measurements, calculate the ovality and taper of the cylinder.
TECHNICAL DATA, Engine - Diesel Td4.
13. Starting with piston No. 1, measure the diameter of the skirt in a plane perpendicular to the axis of the piston pin, at a distance of 12 mm from the bottom edge of the skirt:
TECHNICAL DATA, Engine - Diesel Td4.
14. Compare the piston diameter with the cylinder diameter and calculate the clearance between the piston and the cylinder.
TECHNICAL DATA, Engine - Diesel Td4.
15. Remove the compression rings, integral oil scraper rings and the oil scraper ring expander from the new piston.
16. Insert new rings into the cylinder and check the mounting gap in them at a distance of 30 mm from the upper plane of the block. When measuring the clearance, make sure that the rings are in a plane perpendicular to the axis of the cylinder.
TECHNICAL DATA, Engine - Diesel Td4.
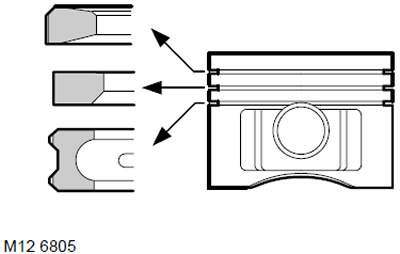
17. Put on the oil scraper rings and the expander, making sure that the rings are in a butt joint and do not overlap.
18. Fit the second compression ring with the 'TOP' mark facing up.
19. Fit the top compression ring with the 'TOP' mark facing up.
20. Check up a backlash between a ring and a piston flute.
TECHNICAL DATA, Engine - Diesel Td4.
21. Check the fit of the piston pin in the piston: the pin should move with little effort, without jamming or noticeable play.
22. Check the wear of the bushing of the upper head of the connecting rod, check the fit of the pin in the bushing: the pin should move with little effort, without jamming and noticeable play.
TECHNICAL DATA, Engine - Diesel Td4.
NOTE: The connecting rod bushings cannot be replaced. If necessary, the connecting rod assembly is changed.
23. Be convinced of absence of deformation of a rod. Install a new bearing with a running-in layer, marked BLUE, into the connecting rod. Install the new bearing marked RED into the connecting rod cap.
24. Install the covers on the connecting rods, screw the old bolts into place and tighten them to 5 Nm.
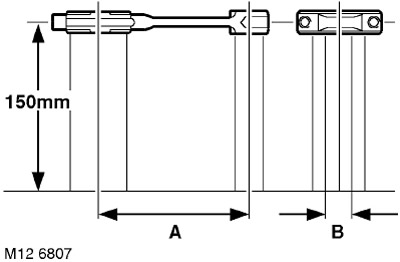
25. Check the parallelism of the axes of the upper and lower heads of the connecting rods by measuring at a distance of approximately 150 mm from the plane of symmetry of the connecting rod.
TECHNICAL DATA, Engine - Diesel Td4.
CAUTION: Do not attempt to straighten a deformed connecting rod.
26. Check for deformation on both sides of the connecting rod.
TECHNICAL DATA, Engine - Diesel Td4.
Installation
1. Wipe the cylinder bore, pistons, piston rings and connecting rods.
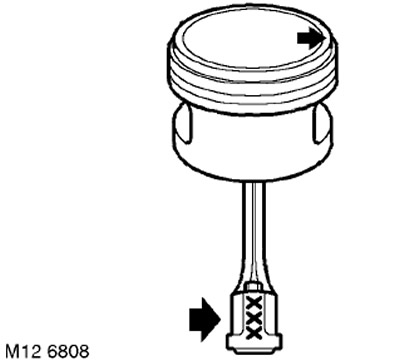
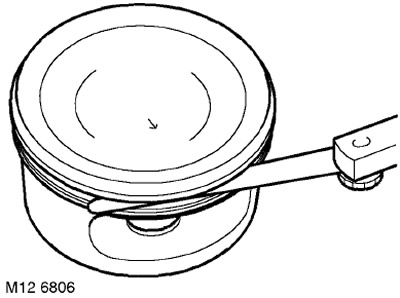
2. Place the pistons on your connecting rods, with the number on the bottom of the connecting rod head facing the arrow on the piston crown as shown.
3. Lubricate the piston pins, piston bores and connecting rod tops with engine oil. Insert the piston pins and secure them with new retaining rings, which must be fully engaged in their grooves.
4. Lubricate the pistons, piston rings and cylinder bore with clean engine oil.
5. Check the freedom of movement of the rings in their grooves. Spread the ring locks 120°apart so that the locks are not on the most heavily loaded side of the piston (the left side of the piston when looking at its front).
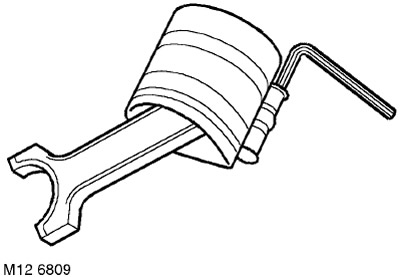
6. Using tool LRT-12-204, crimp the piston rings.
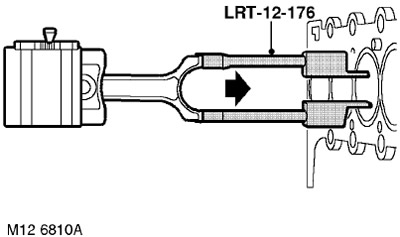
7. Slide guides LRT-12-176 onto the connecting rod to protect the cylinder bore and crankpin.

8. Insert the piston into the cylinder so that the arrow on the bottom of the piston points towards the front of the engine.
9. Remove guides LRT-12-176 from connecting rods.
10. Install connecting rod bearings.
ENGINE - Td4, Piston group, Replacement of connecting rod bearings.
11. Check piston protrusion.
ENGINE - Td4, ADJUSTMENTS, Checking piston protrusion with cylinder head removed.
12. Install the cylinder head gasket.
ENGINE - Td4, Intake and exhaust camshafts, Cylinder head gasket: manual transmission models.
13. Attach "negative" battery terminal.
Comments on this article