Contents: Removal ⇩ Installation ⇩
Removal
1. Disconnect the ground cable from the battery. For more information, refer to Specification.
2.
CAUTION: Never work on a vehicle supported only by a jack. Always support the vehicle with special stands.
Raise and support the vehicle.
3. Drain the coolant from the cooling system. For more information, refer to Draining/Filling Coolant and Bleeding the Cooling System (10/26/01)
4. Remove the throttle body gasket. For more information, refer to Throttle Body Gasket.
5. Remove the front crankshaft oil seal. For more information, refer to Front Crankshaft Oil Seal (12.21.14)
6. Remove the lower cooling fan shroud.
- Release the 2 lower cooling fan shroud clips.
- Loosen and remove the lower cooling fan shroud from the radiator.
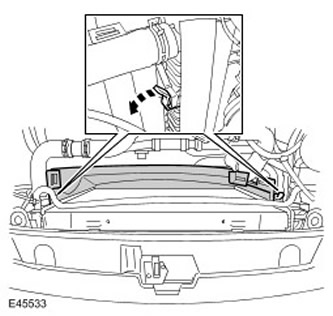
7. Remove the air conditioning (A/C) compressor. For more information, refer to Air Conditioning (A/C) Compressor (82.10.20)
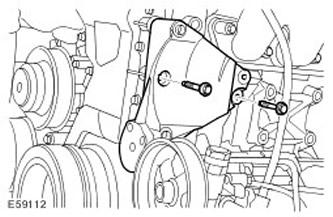
8. Remove the air conditioning compressor support bracket. Remove the two bolts.
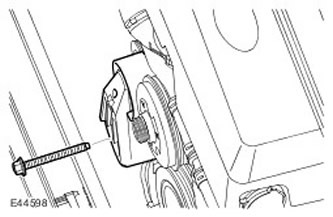
9. Remove the cooling fan drive belt tensioner. Unscrew the bolt.
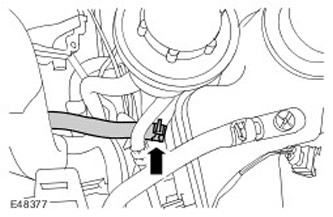
10. Disconnect the expansion tank hose. Release the clamp.
11. Remove the cooling system manifold.
- Release the clamps and disconnect the 4 coolant hoses.
- Remove 4 bolts.
- Disconnect the electrical connector.
- Move the coolant hoses to the side for better access.
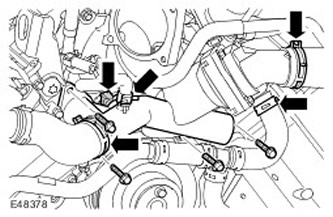
12. Release the engine wiring harness clamps.
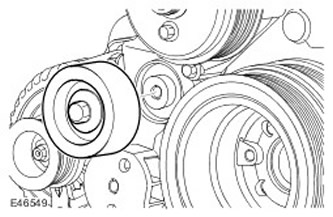
13. Remove the auxiliary drive belt idler pulley. Remove the bolt.
[The article is based on information from the website LRman.ru]
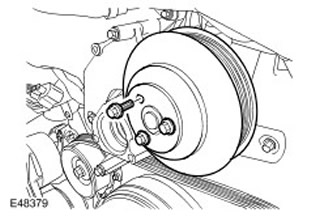
14. Remove the coolant pump pulley. Remove 3 bolts.
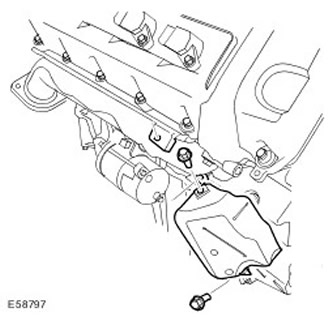
15. Remove the right exhaust manifold heat shield. Remove the two screws.
16. Disconnect the positive battery cable.
- Release the lid.
- Remove the nut.
- Disconnect the electrical connector.
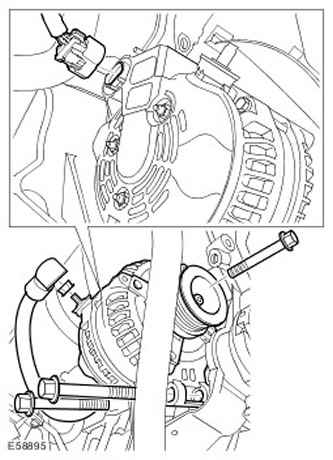
18. Remove the generator support bracket. Unscrew the 4 bolts.
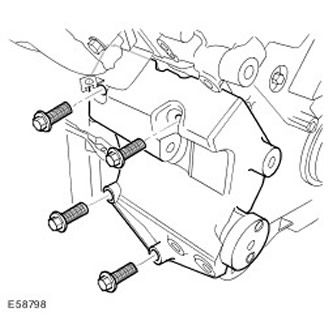
19. Remove the right cylinder head cover. For more information, refer to Right Valve Cover (12.29.44)
20. Remove the left cylinder head cover. For more information, refer to Left Valve Cover (12.29.43)
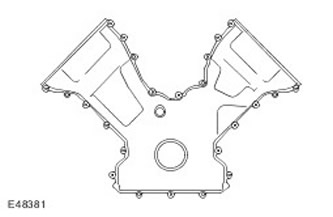
21. Remove the front engine cover.
- Release the engine wiring harness clamp.
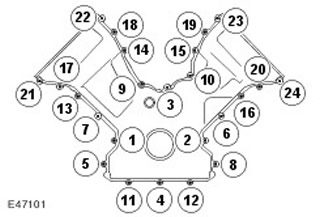
- Remove 24 bolts.
- Remove the gasket and discard it.
Installation
1. Install the front engine cover.
- Clean the contact surfaces of the parts.
- Apply a 3mm wide and 12mm long bead of sealant to the 8 locations indicated.
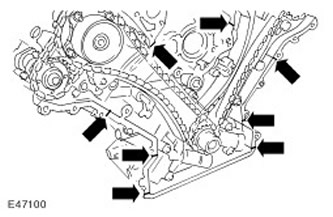
2. Tighten the bolts evenly and gradually in the sequence shown. (tightening torque 12 Nm).
3. Install the front crankshaft oil seal. For more information, refer to Front Crankshaft Oil Seal (12.21.14)
4. Install the left valve cover. For more information, refer to Left Valve Cover (12.29.43)
5. Install the right valve cover. For more information, refer to Right Valve Cover (12.29.44)
6. Install the generator support bracket.
- Clean the mounting studs.
- Clean the contact surfaces of the parts.
- Tighten the bolts (tightening torque 45 Nm).
- Clean the contact surfaces of the parts.
- Tighten the bolts (tightening torque 48 Nm).
- Tighten the nut (tightening torque 10 Nm).
- Secure the lid.
10. Install the cooling system manifold.
- Tighten the bolts (tightening torque 6 Nm).
- Connect the coolant hoses.
- Secure with clamps.
12. Install the coolant pump pulley. Tighten the bolts. (tightening torque 10 Nm).
13. Install the accessory drive belt pulley. Tighten the bolt. (tightening torque 25 Nm).
14.
NOTE: Be careful when connecting the ignition coil ground connectors to the spark plugs. If the ground is not good enough, one or both banks of the engine cylinders will not start.
Secure the engine wiring harness clamps.
15. Install the cooling fan drive belt tensioner.
- Tighten the pulley bolt (tightening torque 25 Nm).
- Tighten the belt tensioner bolt (tightening torque 40 Nm).
17. Connect the air conditioning compressor. For more information, refer to Air Conditioning (A/C) Compressor (82.10.20)
18. Install the cooling fan shroud.
19. Install the throttle body gasket. For more information, refer to Throttle Body Gasket.
20. Fill the cooling system with coolant and bleed air from the system. For more information, refer to Draining/Filling Coolant and Bleeding the Cooling System (10/26/01)
Comments on this article