Contents: Removal ⇩ Installation ⇩
Removal
1. Disconnect the ground cable from the battery. For more information, refer to Specification.
2. Remove the air supply system resonator.
3. Remove the air cleaner assembly. For more information, refer to Air Cleaner (10/19/01)
4. Remove the individual ignition coils. For more information, refer to Ignition Coil in Block with Spark Plug (18.20.44)
5. Remove the remaining individual ignition coils.
6. Disconnect the positive crankcase ventilation (PCV) line.
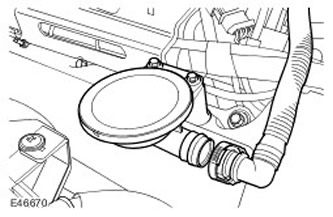
7. Disconnect the engine wiring harness from the support bracket.
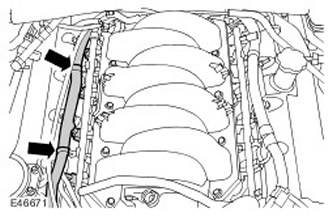
8. Disconnect the variable valve timing (VCT) solenoid electrical connector.
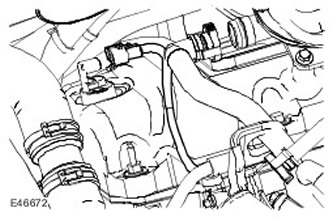
9.
NOTE: Before removing the bolt, note their location.
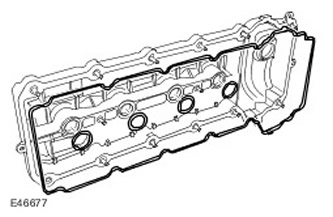
Remove the cylinder head cover.
- Remove 14 cylinder head cover mounting bolts.
- Remove the engine cover retainer.
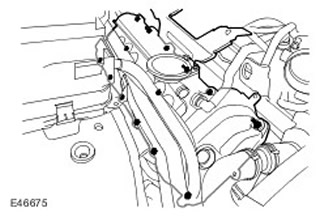
10. Remove and discard the cylinder head cover gasket.
11. Remove the seals from the cylinder head cover hole.
12.
NOTE: Do not perform further disassembly if the part is removed only for access.
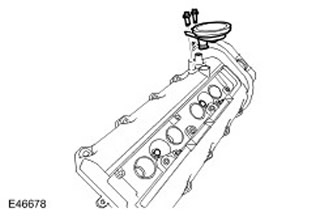
Remove the positive crankcase ventilation valve.
- Remove two bolts.
- Remove the sealing ring and discard it.
Installation
1. Install the positive crankcase ventilation valve.
- Clean the contact surfaces of the parts.
- Install the sealing ring.
- Tighten the bolts (tightening torque 6 Nm).
3. Install a new cylinder head cover gasket.
4.
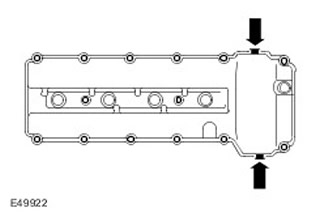
NOTE: Apply two beads of silicone gasket sealant as shown in the illustration. The beads of sealant should be 3 mm in diameter and 12 mm long. Install the cylinder head cover immediately after applying the sealant. The cylinder head cover must be installed directly onto the head without smearing the sealant on the gasket.
Install the cylinder head cover. Clean the contact surfaces of the parts.
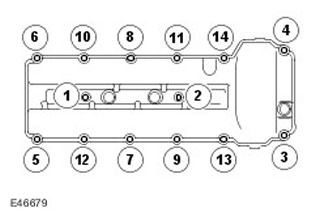
5. Screw in the cylinder head cover bolts.
- Screw in the cylinder head cover bolts in accordance with their previous location.
- Tighten the bolts (tightening torque 12 Nm).
- Tighten the bolts in the order shown in the figure.
6. Connect the variable valve timing (VCT) solenoid electrical connector.
7. Install the individual ignition coil. For more information, refer to Ignition Coil in Block with Spark Plug (18.20.44)
8. Install the remaining individual ignition coils.
9. Connect the engine wiring harness to the support bracket.
10. Connect the positive crankcase ventilation (PCV) line.
11. Install the air cleaner assembly. For more information, refer to Air Cleaner (10/19/01)
12. Install the air supply system resonator.
Comments on this article