NOTE: The inner rear side panel and wheel arch is an assembly of the inner rear side panel, rear wheel arch inner panel, rear wheel arch outer panel and rear light support panel.
NOTE: The service panel is not fully welded.
NOTE: The panel is divided into sections so as not to disturb the roof panel.
Removing
1. The inner rear side panel and wheel arch are replaced along with the following items:
- rear bumper cover
- rear bumper
- Rear side panel
- Backdoor
- Side glass at rear
- Rear subframe complete with suspension
2. For more information on this repair procedure, refer to the following sources: For more information, refer to the chapter: Body and Frame (501-26 Body Repairs - Vehicle Special Information and Approval Checks, Description and Operation) / Standard techniques used at the service station (100-00 General information, Description and principle of operation).
3. Remove the rear side panel. For more information, refer to the chapter: Rear Side Body Panel (501-30 Repairs of sheet metal elements of the back, Removal and installation).
4. Remove the rear subframe/suspension as one unit.
5. Remove the brake line.
6. Right side only: Unclip and set aside the fuel vent hose.
7. Remove a back of a back seat. For more information, refer to the chapter: Front Seat Back Heater Mat (501-10 Seat, Removal and installation).
8. Release the wiring harness and set it aside.
9. Mill out the contact welding points.

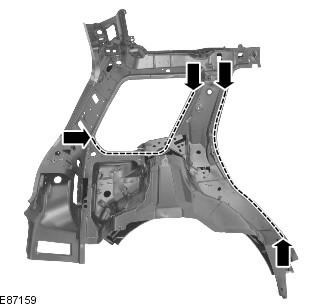
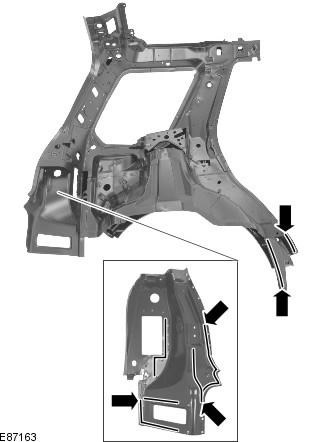
10. Cut the old panel at the locations shown, using the new panel as a template and ensuring that the new panel overlaps.
NOTE: Allow a minimum spacing of 50 mm between staggered butt joints.

11. Disconnect the connections and remove the old panel, while also releasing the NVH elements.
Installation
1. Prepare a new panel in areas where it is not fully welded and spot weld.
2. Prepare the mating surfaces of the old and new panels.
3. Drill holes in the new panel in preparation for MIG electric rivet welding.

4. Position the new panel in the desired location and secure it. Check position alignment. If it is correct, go to the next paragraph. If not, make any necessary adjustments and recheck before continuing.
5. Remove the new panel.
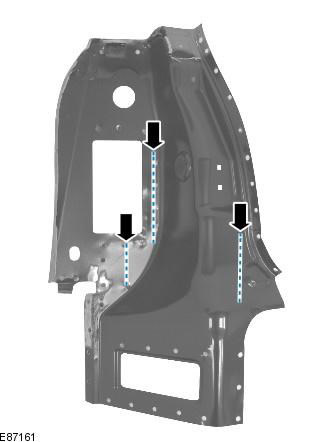
6. Apply adhesive to the areas shown.
7. Replace element if necessary (s) NVH.
8. Apply glue to the NVH elements.
9. Position the new panel in the desired location and secure it.
10. After fixing the panels in the desired position, make tack butt joints.
11. Clean the tack welds.
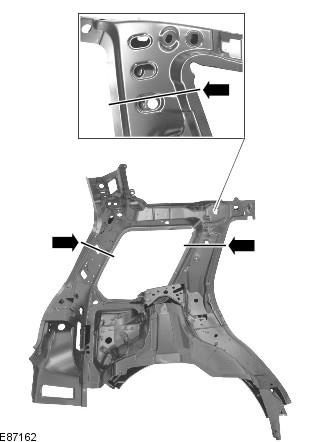
12. Make MIG butt welds.

13. Weld with electric rivets using MIG technology.
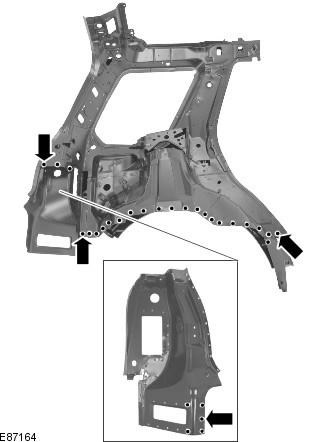
14. Spot weld.
15. Clean up all welds.
16. Installation of the corresponding panels and mechanical elements is carried out in the reverse order of removal.
Comments on this article