Contents: Dismantling ⇩ Installation ⇩
Dismantling
1. Disconnect the negative battery terminal.
2. Secure the hood in a vertical position.
3. Remove the air intake hoses.
DIESEL ENGINE FUEL SUPPLY SYSTEM, REPAIR WORK, Air intake system ducts.
4. Remove the working fluid cooling heat exchanger.
AUTOMATIC TRANSMISSION: JATCO, REPAIR WORK, Heat exchanger for cooling the working fluid: cars with Td4 engine.
5. Remove the starter.
ENGINE STARTING AND BATTERY CHARGING SYSTEM, REPAIR WORK, Starter - Td4 engine.
6. Remove the transfer case (IRD).
TRANSFER CASE, REPAIR WORK, Transfer case: models with Td4 engine.
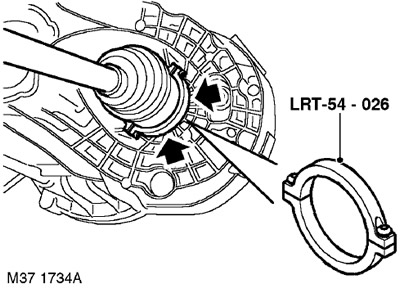
7. Install the LRT-54-026 tool onto the drive shaft inner joint. Use a lever to release the inner joint from the gearbox.
8. With the help of a partner, move the hub outward and remove the left drive shaft from the gearbox.
CAUTION: When removing the shaft, keep it horizontal to avoid damaging the differential seal.
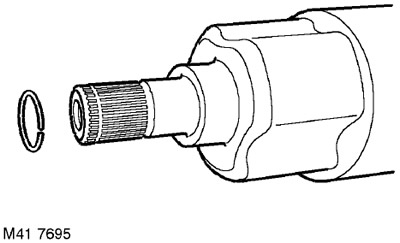
9. Remove and discard the drive shaft retaining ring.
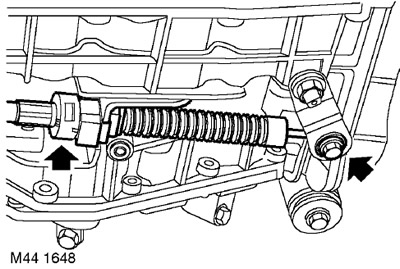
10. Loosen the nut securing the selector cable to the gearbox lever.
11. Remove the clip, disconnect the selector cable and remove the lever.
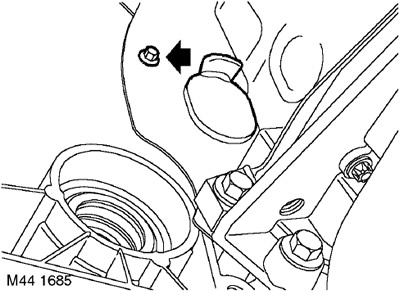
12. Unscrew the bolt securing the cover to the gearbox.
13. Remove the plug from the drive disk housing cover to gain access to the torque converter mounting bolts.
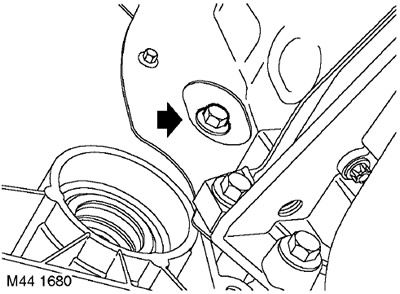
14. Mark the relative positions of the drive disk and torque converter for subsequent assembly.
15. By turning the engine shaft, gain access to the four bolts securing the drive disk to the torque converter and unscrew them.
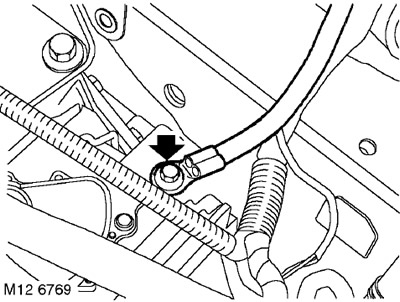
16. Remove the bolt and disconnect the ground bus from the gearbox.
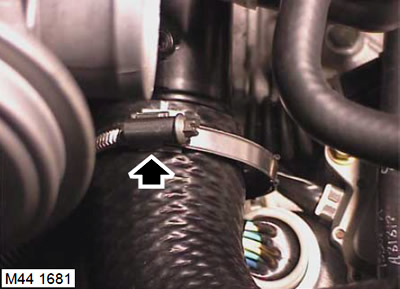
17. Loosen the clamp and disconnect the hose from the turbocharger outlet.
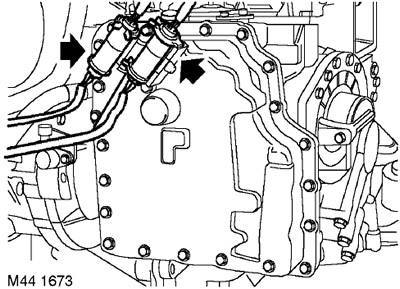
18. Release the electrical connectors from the fasteners and disconnect the 2 connectors from the main harness.
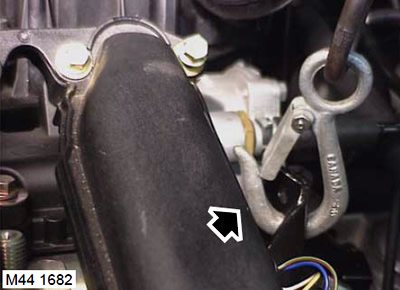
19. Attach the rigging chains to the eyes and lift the engine to remove its weight from the supports.
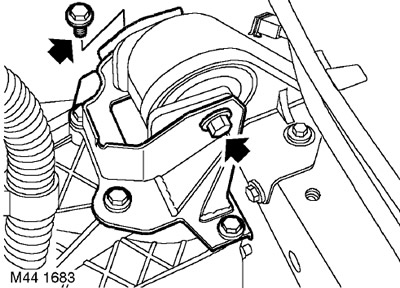
20. Remove the through bolt securing the gearbox bracket to the left support.
21. Lower the box so that it moves away from the support.
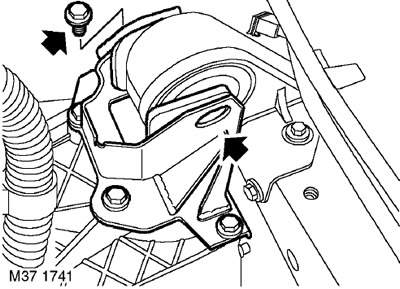
22. Unscrew the 4 bolts securing the left support bracket to the gearbox and remove the bracket.
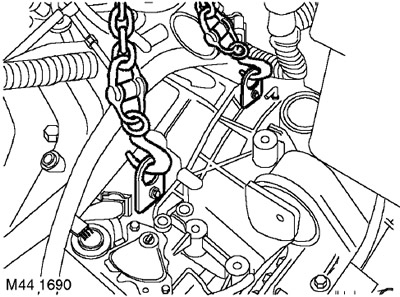
23. Install the lifting eyes on the gearbox and secure them with bolts.
24. Attach the rigging chains to the eye and hang the gearbox.
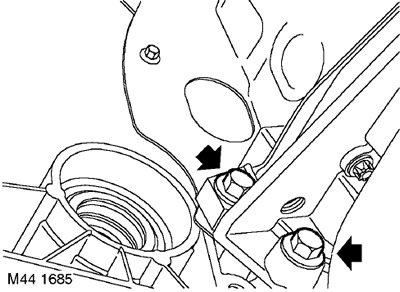
25. Unscrew the 2 bolts securing the gearbox to the engine.
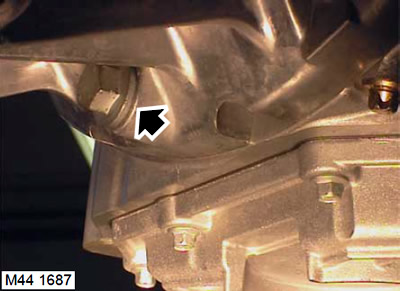
26. Unscrew the lower gearbox mounting bolt.
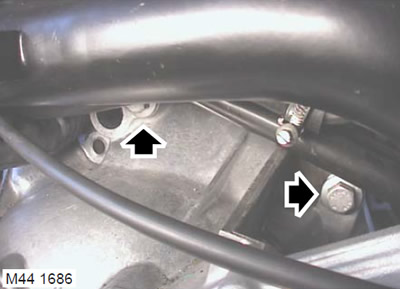
27. Remove the 2 upper bolts securing the gearbox to the engine.
28. Release the gearbox from the two guide pins.
29. Lower the gearbox to the floor.
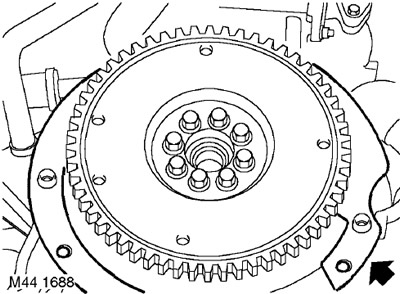
30. If necessary, remove the cover from the gearbox
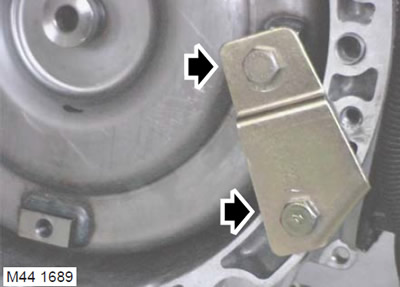
31. Install the torque converter retaining plate and secure it with screws.
Installation
1. Clean the gearbox cover.
2. Check that the cover is on the mounting pins.
(The source of the article is located on the website: www.LRman.ru)
3. Wipe the drive disc and check that it is not cracked or deformed.
4. Wipe the mating surfaces of the engine and gearbox, the dowel pins and the dowel seats.
5. Remove the torque converter retaining plate.
6. Check that the torque converter is fully seated on the oil pump drive by measuring dimension 'A' shown in the figure. Dimension A = 27 mm.
7. Attach the rigging chains to the eyes and hang the gearbox.
8. Raise the gearbox and slide it onto the mounting pins. Screw in the gearbox-to-engine mounting bolts and tighten them to 85 Nm.
9. Screw in the cover mounting bolt and tighten it. Tightening torque 10 Nm.
10. Remove the gearbox rigging.
11. Install the left bracket on the gearbox, screw in the bolts and tighten them to a torque of 85 Nm.
12. Raise the engine, position the gearbox bracket against the support, tighten the through bolt to 100 Nm.
13. Disconnect the rigging chains from the engine.
14. Align the drive disc and torque converter position marks and tighten the bolts to 45 Nm.
15. Install the bushing onto the hatch cover.
16. Install the selector lever, connect the selector cable and secure the cable housing to the bracket.
17. Adjust the selector cable.
AUTOMATIC TRANSMISSION: JATCO, ADJUSTMENTS, Selector cable adjustment.
18. Connect the transmission harness connectors and secure them in the brackets.
19. Place the ground wire on the gearbox and tighten the mounting bolt. Tightening torque 25 Nm.
20. Connect the heat exchanger hose and tighten the clamp.
21. Install a new snap ring onto the end of the left drive shaft.
22. With the help of a partner, insert the left drive shaft into the gearbox, holding it at the correct angle so as not to damage the gearbox seal.
23. Install the transfer case (IRD).
TRANSFER CASE, REPAIR WORK, Transfer case: models with Td4 engine.
24. Reinstall the starter.
ENGINE STARTING AND BATTERY CHARGING SYSTEM, REPAIR WORK, Starter - Td4 engine.
25. Install the working fluid cooling heat exchanger.
AUTOMATIC TRANSMISSION: JATCO, REPAIR WORK, Heat exchanger for cooling the working fluid: cars with Td4 engine.
26. Install the air intake hoses.
DIESEL ENGINE FUEL SUPPLY SYSTEM, REPAIR WORK, Air intake system ducts.
27. Connect the negative battery terminal.
28. Untie the hood and close it.
Comments on this article