Dismantling
1. Disconnect "negative" battery terminal.
2. Remove the front bumper.
EXTERIOR PARTS, REPAIR WORKS, Front bumper assembly - for vehicles up to 2004 model year.
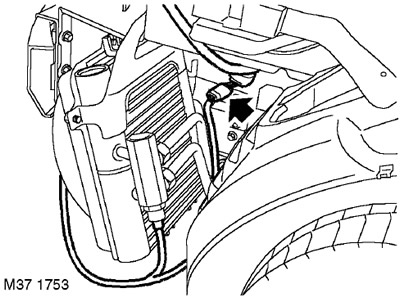
3. Disconnect the combined fan and thermostat connector from the harness.
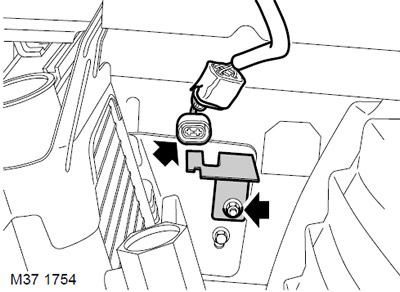
4. Remove the connector from the bracket.
5. Turn away a nut of fastening of an arm of a socket and take away an arm aside.
6. Place a container under the transmission heat exchanger hoses to collect the fluid.
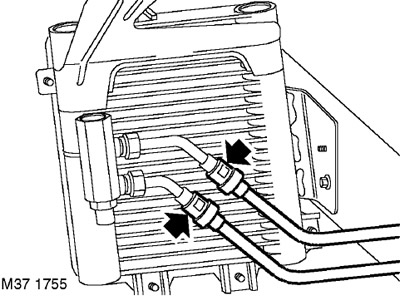
7. Disconnect the hose quick connectors from the heat exchanger.
CAUTION: Before disconnecting or removing system components, make sure that the surfaces adjacent to the connection points are free of dirt. Install plugs in fittings and piping to keep dirt out of the system.
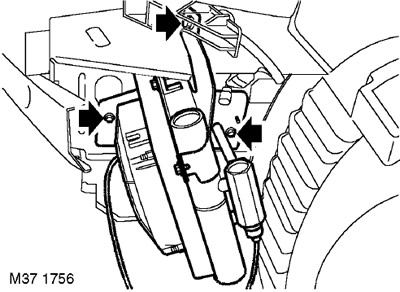
8. Remove the 3 bolts securing the blown heat exchanger to the chassis and move it aside.
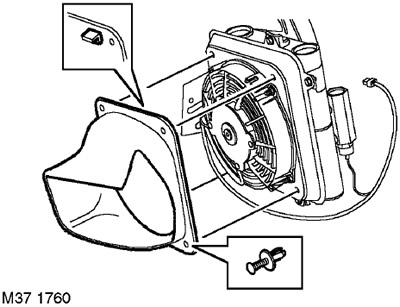
9. Turn off 2 self-tapping screws, release an air duct from clamps and take it aside.
10. Remove the 5 screws securing the fan shroud to the heat exchanger and move the shroud aside.
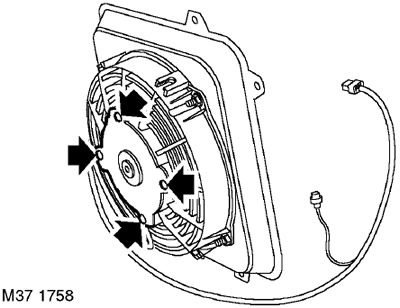
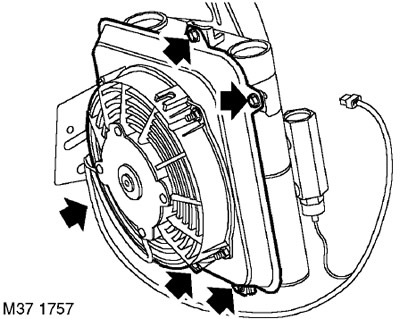
11. Turn away 4 nuts of fastening of the engine of the fan to a casing and remove it.
NOTE: If disassembly was carried out only to provide access to other elements of the system, then further disassembly operations should not be performed.
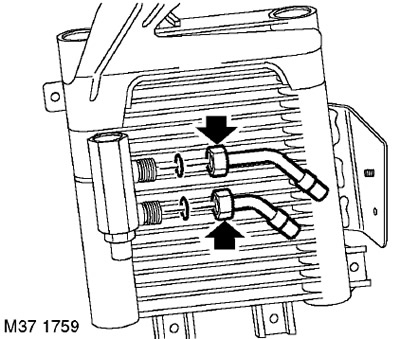
12. Turn away nuts of fastening of hoses to unions of the heat exchanger and take away hoses aside.
CAUTION: To avoid damaging the components, loosen and tighten the nuts while holding the fitting with a second wrench.
13. Remove and discard the o-ring.
Installation
1. Install new O-rings on the heat exchanger hoses.
2. Connect the hoses to the heat exchanger, fit the nuts and tighten them to 25 Nm.
3. Install the fan cover on the heat exchanger, screw in the bolts and tighten them to 5 Nm.
4. Install the fan motor assembly on the casing, screw in the bolts and tighten them to a torque of 5 Nm.
5. Install the air duct and fix it with self-tapping screws.
6. Install the blown heat exchanger assembly, screw in the bolt and tighten the upper bolt with a torque of 5 Nm. The lower bolts should be tightened to 10 Nm.
7. Make sure that the surface of the fittings is clean, connect flexible hoses to them and secure.
8. Fit the connector bracket and tighten the nut to 10 Nm.
9. Connect the connector to the harness, fix the connector in the bracket.
10. Reinstall the front bumper.
EXTERIOR PARTS, REPAIR WORKS, Front bumper assembly - for vehicles up to 2004 model year.
11. Attach "negative" battery terminal.
Comments on this article