Contents: Disassembly ⇩ Assembly ⇩
Disassembly
CAUTION: Ensure that the safe working load (SWL) of the spring remover is not less than the spring rate listed in the Specifications section.
CAUTION: Always follow the spring remover manufacturer's instructions.
1.
CAUTION: Do not work on or under a vehicle that is supported only by a jack. Always support the vehicle securely.
Raise and support the vehicle.
2. Remove the shock absorber and spring assembly. For more information, refer to Shock Absorber and Spring Assembly (60.30.25/99)
3. Clamp the appropriate spring removal tool in a vice.
4. Install the shock absorber and spring assembly in a spring remover. Compress the spring to overcome its tension, but no more.
5. Remove the shock absorber.
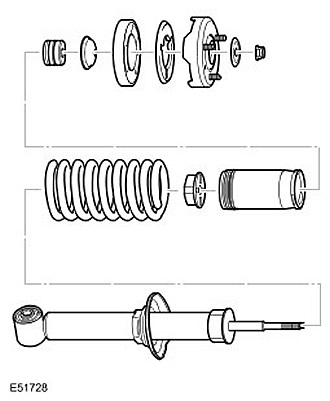
- Having secured the shock absorber axle, unscrew and discard the nut.
- Remove the upper bushing spring plate and the upper bushing.
- Remove the upper support assembly.
- Remove the dust tube and elastic plate assembly.
- Remove the spring assist device.
6. Remove the spring from the spring remover.
7. Clean the parts and check them for wear.
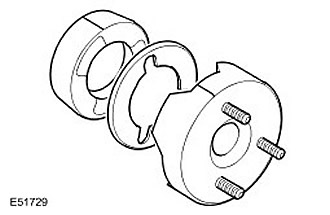
- To facilitate subsequent assembly, mark the position of the rubber insulator in relation to the top support plate.
- Remove the rubber insulator.
- Remove the spacer element.
- Remove the elastic plate from the dust tube.
Assembly
1. Install the spring in the spring remover. When installing, make sure that the closed coils are directed towards the top of the shock absorber.
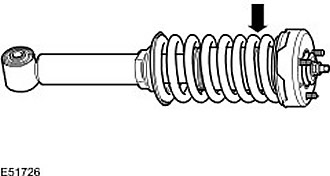
2. Install the spring assist device.
3. Install the dust tube. Install the elastic plate into the dust tube.
4. Install the shock absorber. Make sure the spring is seated correctly in the spring seat.
5. Install the top support.
- Install the spacer and rubber insulator, ensuring that the spacer rests on the stud heads and the insulator is aligned with the mark made earlier.
- Install the upper bushing and the upper bushing spring plate.
- Install the new nut and tighten it to 98 Nm.
6. Install the shock absorber and spring assembly. For more information, refer to Shock Absorber and Spring Assembly (60.30.25/99)
Comments on this article