WARNING: Be careful when draining the oil as the oil can be very hot.
1. Make sure the automatic transmission selector is in position "R" and the parking brake is fully applied.
2. Clean the area around the transmission filler plug.
3. Remove the transmission filler plug.
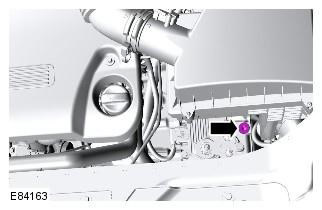
4. Raise and support the vehicle.
WARNING: It is forbidden to carry out work on a vehicle supported only by a jack. Always place secure supports under the vehicle.
NOTE: Park the vehicle on a level, level surface.
5. Remove the front bottom guard. Refer to procedure: Motor protection (501-02 Front body panels, Removal and installation).
6. Clean the area around the transmission check and drain plugs.
7. Place a container under the gearbox.
8. Turn out a stopper of control of level of a liquid in a transmission.
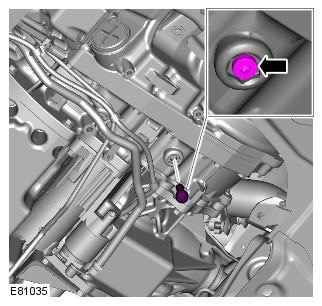
9. Turn out a drain plug of a transmission.
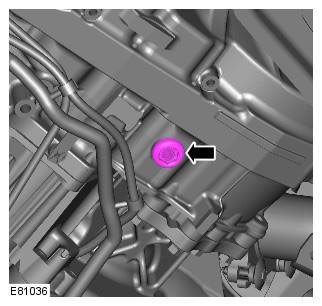
10. Screw in a drain plug of a transmission. Tightening torque: 47 Nm
NOTE: Install a new gasket.
11. Lower the car.
12. Fill the transmission with the proper transmission fluid in sufficient quantity to allow it to flow through the fluid level plug hole.
13. Screw in the fluid level control plug in the gearbox. Tightening torque: 7 Nm
14. Add an additional 0.5 liters of transmission fluid.
15. Screw in the gearbox filler plug. Tightening torque: 40 Nm
CAUTION: A new O-ring must be installed.
16. Connect Land Rover approved diagnostic equipment. Start the engine and let it run.
17. Using diagnostic equipment to monitor the fluid temperature, allow the temperature to rise to 60 degrees Celsius.
18. Remove the selector lever from the 'P' position, stopping in each position for 2-3 seconds, then return to the 'P' position.
19. Raise the car.
20. Turn out a stopper of control of level of a liquid in a transmission.
WARNING: Use protective gloves.
NOTE: The fluid level plug and drain plug use the same point on the transmission. The inner plug is used for level indication, the outer plug is for draining the liquid.
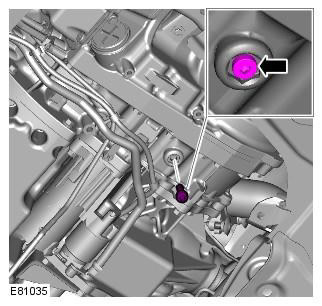
21. With the engine running, a small amount of fluid should drip from the fluid level plug hole.
22. Screw in the fluid level control plug in the gearbox. Tightening torque: 7 Nm
CAUTION: A new O-ring must be installed.
23. Install the front bottom guard. Refer to procedure: Motor protection (501-02 Front body panels, Removal and installation).
Comments on this article