Contents: Model Lucas Girling 25.4 mm AS/AS ⇩ Removal ⇩ Repair ⇩ Replacing plunger seals ⇩ Assembly ⇩ Brake master cylinder parts (non-ABS) ⇩ Installation ⇩
Model Lucas Girling 25.4 mm AS/AS
Please note: This brake master cylinder cannot be installed on a system with ABS.
Removal
1. Disconnect the battery.
2. Place a container under the brake master cylinder to collect the fluid.
3. Thoroughly clean the brake pipe connection points. Unscrew the tube fasteners and plug the tubes and fittings.
4. Disconnect the brake fluid level sensor wire from the reservoir cap.
5. Unscrew the two nuts securing the master brake cylinder to the booster, remove the flat and spring washers.
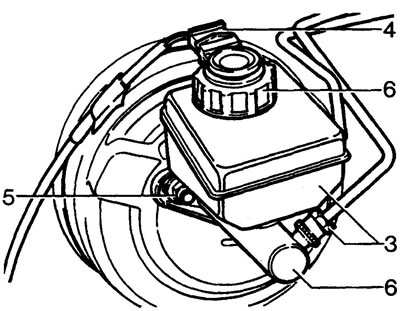
6. Remove the master cylinder, open the reservoir cap and drain the brake fluid.
Repair
7. Wash the brake cylinder housing, assess its condition, replace if necessary.
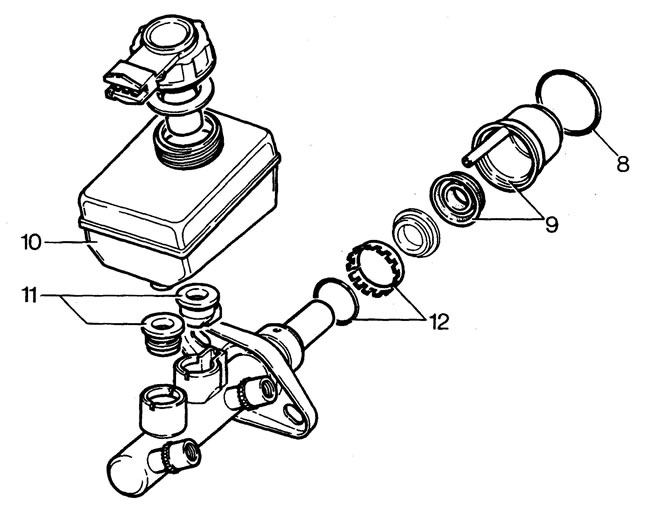
8. Clamp the brake cylinder body in a vice. Remove and discard the sealing ring (from the amplifier side).
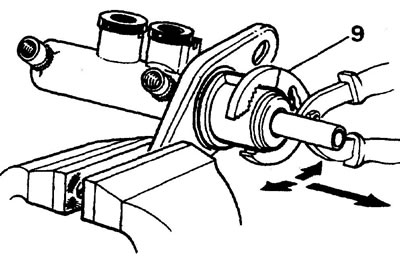
9. Using pliers, twist the guide cap of the housing and remove it. Discard the seals.
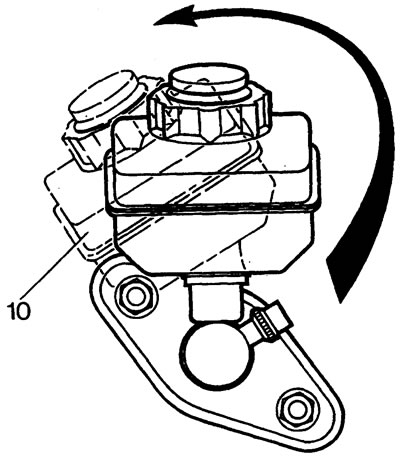
10. Remove the reservoir from the master brake cylinder. Be careful not to break the tank fittings.
11. Remove the master cylinder reservoir seals. Remember where they are installed: the seals are different. Discard the seals.
12. Remove the retaining ring and seal from the cylinder body.
13. Remove the guide ring from the master cylinder that supports the primary circuit piston. Place the removed parts in the set and in the order of removal.
14. Pull the primary piston out of the cylinder.
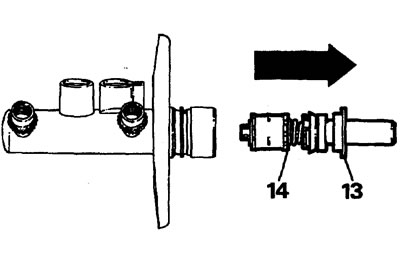
Note: The primary piston can only be replaced as an assembly.
15. The secondary piston must remain at the bottom of the brake cylinder. To remove it, tap the end of the cylinder on a wooden block, and after the piston appears, carefully remove it.
16. If the swirl spacer does not come out with the piston, repeat operation p. 15 to remove it.
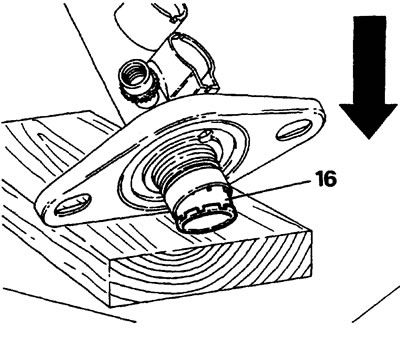
17. Wash all parts in clean brake fluid and assess the condition of the cylinders and pistons. Seals and oil seals are sold as a set.
Replacing plunger seals
18. From the secondary piston, remove and discard:
- (A) springs;
- (B) seal holder;
- (C) Primary piston cover seal;
- (D) washer;
- (E) L-shaped seal.
Note: You will need a hook to remove the L-shaped seal. When removing the seal, be careful not to damage the piston.
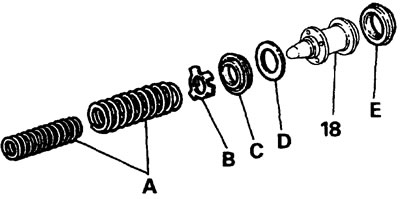
19. Lubricate the new L-ring with clean brake fluid and install it on the piston.
20. Install the primary piston cover seal and seal retainer. Install the springs, check that the springs are seated correctly on the holder.
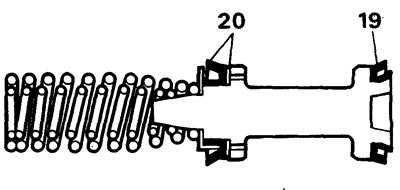
Assembly
21. Place the swirl spacer into the cylinder.
Caution: Perform further operations very carefully, do not damage the seals when installing the piston into the cylinder. Lubricate the parts with clean brake fluid.
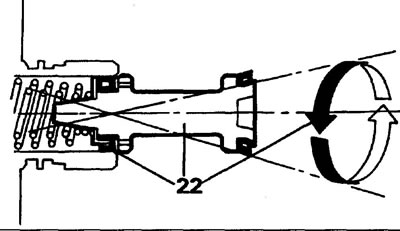
22. Insert the piston into the cylinder until the primary piston cover seal engages. Rotate and rock the piston until it slowly enters the cylinder.
Brake master cylinder parts (non-ABS)
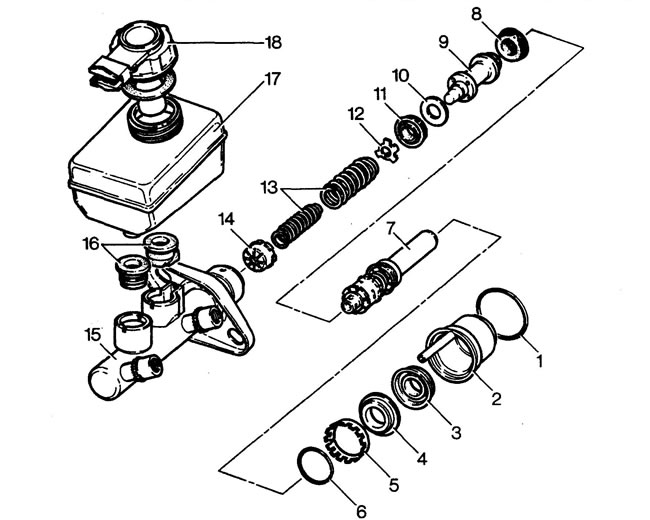
1 - flange sealing ring, 2 - guide cap, 3 - seal (by rarefaction), 4 - guide ring, 5 - retaining ring, 6 - sealing ring (housing), 7 - primary plunger, 8 - L-shaped seal, 9 - secondary plunger, 10 - washer, 11 - primary piston cover seal, 12 - seal holder, 13 - springs, 14 - swirl spacer, 15 - housing, 16 - reservoir seals, 17 - reservoir, 18 - liquid level sensor.
23. Install the primary piston in the same way.
24. Install the primary piston guide ring.
25. Place the sealing ring into the cylinder groove.
Caution: Do not twist the ring, make sure that the ring does not come into contact with the piston seal.
26. Install the retaining ring.
27. Install the master cylinder reservoir seal.
28. Install the seal (by rarefaction) either onto the primary plunger or into the guide cap with the open part facing the plunger.
29. Lubricate the seal with brake fluid, install the guide cap in place. Once the cap is installed, do not adjust its fit.
30. Lubricate the cylinder body sealing ring and install it on the cylinder flange.
31. Install the tank.
Installation
32. Check that the flange sealing ring is installed correctly, install the brake master cylinder on the brake booster. Tighten the mounting nuts to 26 Nm.
33. Connect the brake lines. Tightening torque 18 Nm.
34. Fill the brake fluid into the reservoir.
35. Bleed the system.
Comments on this article