Contents: Removal ⇩ Installation ⇩
Removal
All cars
1. To gain access, fully extend the steering column.
2. Remove the steering wheel. For more information, refer to Steering Wheel (57.61.01)
3. Remove the driver's side vent trim panel. For more information, refer to Driver's Side Vent Trim Panel (76.46.12)
4. Remove the driver's side trim panel.
- Release the clamp.
- Remove 2 screws.
- Disconnect the electrical connector.
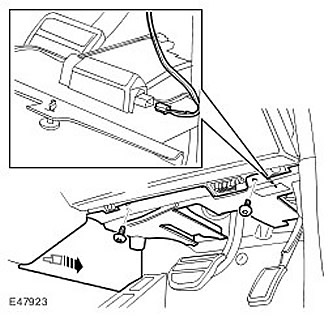
5. Remove the instrument panel access panel. Release the 2 clips.
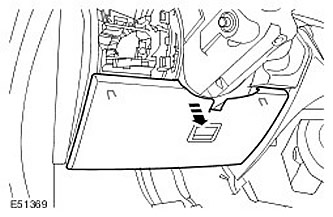
6. Remove the upper steering column cover. Release the 6 clips.
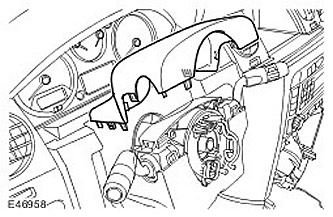
7. Remove the lower steering column cover.
- Remove 3 Torx screws.
- Release the steering column adjustment lever.
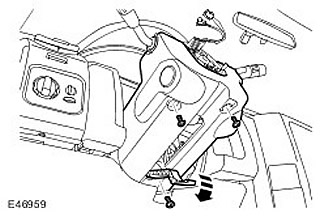
8. Remove the steering column side trim panel.
- Release the clamps.
- Repeat the above procedure on the other side.
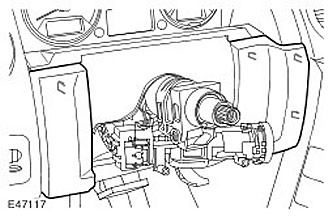
9. Disconnect the 2 electrical connectors from the steering column multifunction switches.
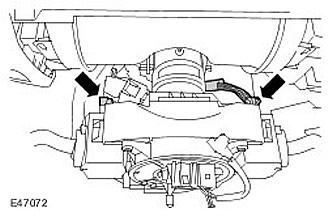
10. Disconnect the 2 electrical connectors from the coil spring.
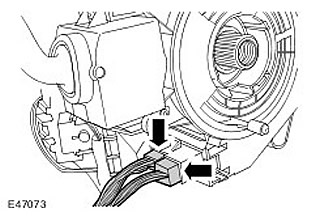
11. Remove the steering column switch assembly. Remove the 4 Torx head bolts.
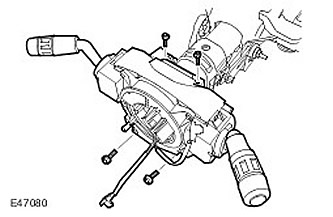
12. Remove the steering column cover panel.
- Remove 2 Torx screws.
- Release the 2 clamps.
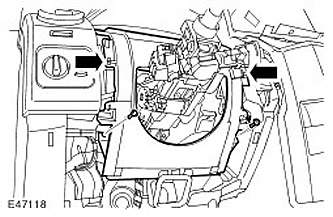
13. Disconnect the ignition switch electrical connector.
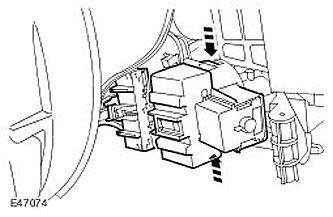
14. Disconnect the passive coil electrical connector.
(The publication was copied from a web resource: www.LRman.ru)
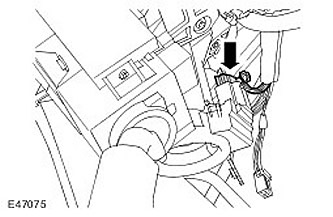
15. Disconnect the steering angle sensor electrical connector.
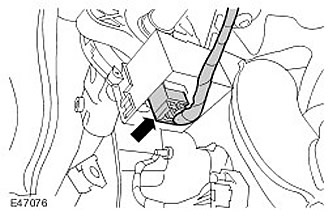
Cars with electric steering column adjustment.
16. Disconnect the steering column adjustment motor electrical connector.
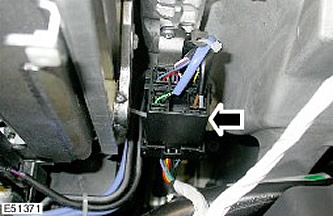
All cars
17. Move the steering column wiring harness to the side. Release the clamp.
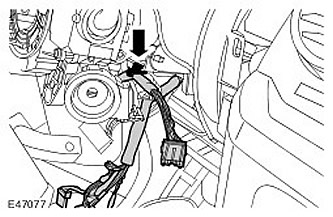
18. Disconnect the steering column intermediate shaft from the steering column.
- Mark the installation position.
- Unscrew the special bolt and discard the nut.
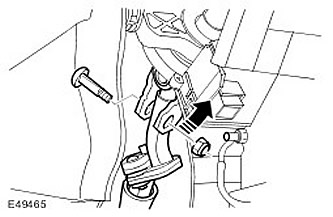
19.
CAUTION: Use caution when releasing the adjustment lever when the steering column is removed from the vehicle. The spring is highly compressed when released and may cause injury. Be careful not to place your fingers in areas where they may be pinched.
CAUTION: If the steering wheel angle sensor was damaged when removing the steering column, the sensor MUST be replaced.
Remove the steering column with assistance. Remove the 4 Torx bolts.
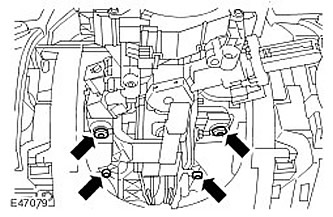
20.
NOTE: Do not perform further disassembly if the part is removed only for access.
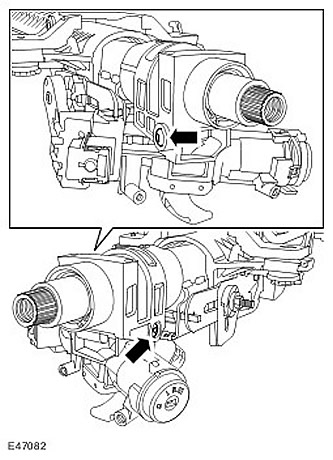
Remove the ignition switch assembly. Loosen and discard the 2 shear bolts.
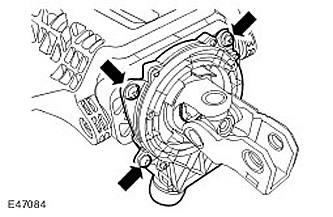
21. Remove the steering angle sensor. Remove the 3 Torx screws.
Installation
Cars with electric steering column adjustment.
CAUTION: The potentiometer adjustment values are unique to each steering column. Entering the wrong code when performing calibration may result in damage to the vehicle.
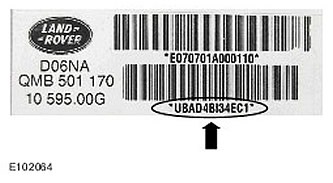
For future reference, write down the potentiometer hex code located on the label on the new steering column.
All cars
2. Install the steering angle sensor. Tighten the Torx screws. (tightening torque 3 Nm).
3. Install the ignition switch assembly. Tighten the shear bolts until the bolt heads shear off.
4.
CAUTION: Make sure the bolt holes are clean and free of metal shavings.
CAUTION: Steering column bolts must be tightened by hand at least 3 turns.
CAUTION: DO NOT use air tools on steering column bolts.
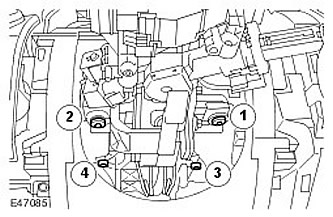
Install the steering column with assistance. Tighten the bolts in the sequence shown. (tightening torque 25 Nm).
5. Attach the intermediate shaft of the steering column. Screw in the special bolt and tighten the new nut with a torque of 22 Nm.
6. Secure the wiring harness to the steering column.
Cars with electric steering column adjustment.
7. Connect the steering column adjustment motor electrical connector.
All cars
8. Connect the steering angle sensor electrical connector.
9. Connect the passive coil electrical connector.
10. Connect the ignition switch electrical connector.
11. Install the steering column cover panel.
- Secure the clamps.
- Tighten the Torx screws.
12. Install the steering column switch assembly. Tighten the Torx bolts. (tightening torque 3 Nm).
13. Connect the electrical connectors of the coil spring and multifunction switches.
14. Install the steering column side trim panels. Secure the clamps.
15. Install the steering column covers.
16. Install the instrument panel access panel. Secure the clamps.
17. Install the decorative panel.
- Connect the electrical connector.
- Secure the clamp.
- Tighten the screws.
18. Install the steering wheel. For more information, refer to Steering Wheel (57.61.01)
19. Install the driver's side vent trim panel. For more information, refer to Driver's Side Vent Trim Panel (76.46.12)
20. Calibrate the steering angle sensor using a Land Rover approved diagnostic tool.
Cars with electric steering column adjustment.
21. If a new electric steering column is fitted, recalibrate the steering column potentiometer using the Land Rover approved diagnostic system.
Comments on this article