NOTE: This procedure must be performed if new parking brake pads, new rear brake discs have been installed, or if the vehicle has been driven in deep mud (not in water) over 50 miles.
NOTE: If adjustment is required as part of the maintenance checklist, only perform steps 1-14. The lapping procedure for the brake pads is not required in this case.
1. Check that the parking brake is working properly.
2.
WARNING: When the vehicle is in "installation position", the red indicator lamp on the instrument panel will flash. It indicates that the parking brake actuator is in "installation position". This does not indicate a malfunction of the car.
Using the Land Rover approved diagnostic system, set the parking brake to 'set position'.
3. WARNING: It is forbidden to carry out work on a vehicle standing on only one jack. Always support the vehicle with jack stands.
Raise and support the vehicle.
4. Remove wheels.
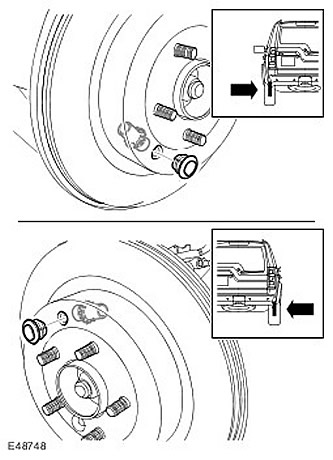
5. Locate the parking brake pad adjuster.
- Remove the access plug.
- Check the brake disc.
6.
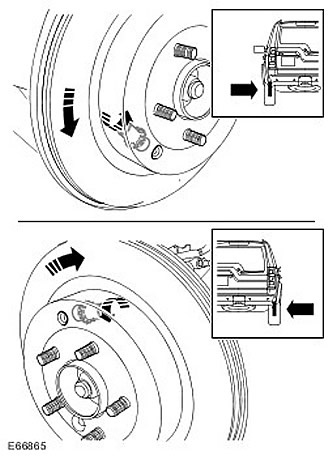
WARNING: Rotation must always be forward.
CAUTION: If less than 40 Nm is required, tighten the adjuster one click at a time.
Using a slotted screwdriver and a torque wrench mounted on the axle shaft nut, turn the parking brake pad adjuster to reduce the gap until the force required to turn the brake disc increases to 40 Nm.
7.
WARNING: Rotation must always be forward.
CAUTION: The force required to rotate the brake disc must be less than 90 Nm.
NOTE: The force required to rotate the brake disc by the axle shaft nut should be 40-90 Nm.
Using a torque wrench on the axle nut, check that the brake disc is still rotating forward before the torque of 90 Nm is reached.
8.
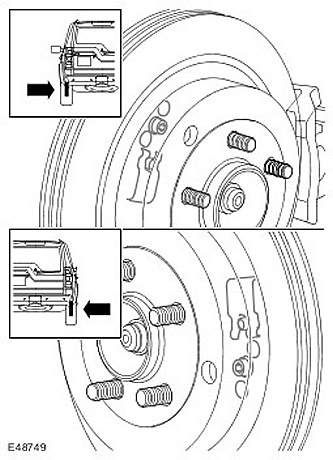
NOTE: The parking brake adjuster must then be turned back EXACTLY 8 clicks. Failure to follow this instruction may result in damage to the parking brake system.
Turn the parking brake adjuster 8 clicks back.
9. Loosen the hex screw of the lash adjuster by half a turn.
10. Using a soft-surfaced mallet, apply a few light taps to the brake disc around the parking brake shoe.
11. Tighten the lash adjuster hex screw (tightening torque 6 Nm).
12. Install the access cover.
13. Repeat the above procedure on the other side.
14. Move the vehicle out of the 'installation position' by applying the parking brake twice.
15. Perform the lapping procedure for the parking brake pads. Running-in parking brake pads (70.40.12). If the parking brake pads or brake discs have not been removed to gain access to other parts, then the lapping procedure DOES NOT NEED.
Comments on this article